Expert Extruder Alignment Services for Maximum Performance
At Rotatek, we specialize in precision extruder alignment services that reduce wear, improve product consistency, and extend equipment life. Using advanced laser tracking technology, our certified technicians align barrels, screws, gearboxes, and motors to OEM tolerances—ensuring your extrusion line runs efficiently and reliably. Whether you’re in plastics, food processing, or industrial compounding, our on-site alignment services minimize downtime and help you maintain peak production. Trust Rotatek for fast, accurate, and fully documented alignment solutions tailored to your operation.
A detailed graphical measurement report is supplied with all precision measurement services.
Our commitment to excellence paired with our state-of-the-art measurement capabilities makes ROTATEK your trusted precision service partner.
ELECTRIC MOTOR ALIGNMENT
FOUNDATION ALIGNMENT
CARDAN SHAFT ALIGNMENT
how Can we Help you?
Our expert team is ready to help you with your next project. Explore the industries we serve or contact us to learn more.
Extruder alignment is the precise positioning of key components in an extrusion system—typically the motor, gearbox, screw, and barrel—to ensure they are perfectly centered and coaxial along the machine’s axis. Proper alignment is critical in both single-screw and twin-screw extruders used across industries like plastics, rubber, food processing, and pharmaceuticals.
Using precision instruments like laser trackers and laser alignment tools, extruder alignment ensures all components are in their exact designed positions. This not only improves machine performance but also extends the lifespan of critical components and reduces maintenance costs.
Rotatek offers on-site extruder alignment services with full documentation and traceable results—helping you get back to full production with confidence.
Extruder alignment is essential because even small misalignments in your extrusion system can lead to major operational problems. The alignment between the motor, gearbox, barrel, and screw directly affects the efficiency, lifespan, and output quality of the entire extrusion process.
Key Reasons Extruder Alignment Matters:
Reduces Mechanical Wear
Misalignment causes uneven loading on screws, barrels, bearings, and couplings—leading to accelerated wear and costly repairs. Proper alignment ensures even load distribution and reduces mechanical stress.
Improves Product Quality
Alignment issues can create inconsistent pressure and flow, which results in variations in material output—such as thickness, texture, or profile. Precision alignment helps maintain consistent, high-quality production.
Maximizes Energy Efficiency
When components are out of alignment, more energy is required to overcome mechanical resistance. A properly aligned extruder runs smoother, uses less power, and generates less heat.
Extends Equipment Life
Keeping components in perfect alignment reduces vibration, friction, and thermal expansion stress—helping extend the life of expensive parts like screws, barrels, gearboxes, and motors.
Minimizes Downtime
Unexpected failures caused by misalignment often result in unplanned downtime. Proactive alignment inspections and corrections reduce the risk of shutdowns and keep production moving.
Supports High-Throughput Manufacturing
In high-volume environments, even small inefficiencies multiply quickly. Alignment ensures reliable, repeatable performance—especially critical in continuous extrusion lines.
At Rotatek, we use state-of-the-art laser alignment systems to ensure your extruder components are perfectly aligned to OEM specs. Whether it’s during a new installation, routine maintenance, or troubleshooting performance issues—precision alignment delivers long-term savings and better performance.
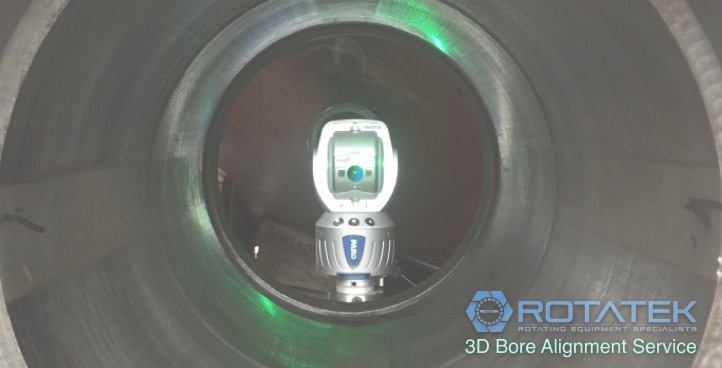
At Rotatek, we employ state-of-the-art laser tracker technology to perform high-precision extruder alignments . This method delivers exceptional unmatched accuracy and repeatability where microns matter.
Step 1: Pre-Alignment SETUP & Inspection
The equipment is thoroughly cleaned, and environmental conditions are evaluated to ensure stable measurement. Targets or SMRs (spherically mounted retroreflectors) are mounted to create a control network.
Step 2: LASER TRACKER DEPLOYMENT
- A high-precision laser tracker is positioned with an unobstructed view of all bores. The tracker emits a laser beam and uses triangulation and interferometry to measure the 3D position of each target with sub-millimeter accuracy.
Step 3: COORDINATE SYSTEM ESTABLISHMENT
A virtual datum line is created by referencing baseline bore centers. The laser tracker maps the exact 3D position of all bores relative to this line, allowing for highly accurate offset, angular, and centerline comparisons.
Step 4: MEASUREMENT AND ANALYSIS
- Measurement data is processed and analyzed to determine misalignments. Real-time data analysis enables immediate decision-making and corrective planning.
Step 5: MECHANICAL ADJUSTMENTS
Based on the measurement data analysis, adjustments are made to align the bores. This may involve shimming, baseplate correction, or housing movement. The laser tracker verifies each adjustment until optimal alignment is achieved.
Step 6: Final Validation & Reporting
A final measurement pass is conducted to ensure all alignment tolerances are met. A detailed, traceable report—including before/after data, graphical analysis, and 3D deviation plots—is provided for QA and maintenance records.
